Thursday, October 18, 2012

Cake Pops


Cake pops are a fun treat for any occasion. I recently made these for my niece's birthday party! All of the kids loved running around with them. It's cake on a stick--how perfect is that!

Ingredients:
-Your favorite cake recipe
-2 tbsp. of your favorite icing
-Cake pop sticks--can be purchased at crafts stores like Michaels
-Wilton's Candy Melts
-Sprinkles

Directions:

1) Bake your favorite cake recipe and let it cool.
2) Crumble the cake into a medium size bowl.
3) Add 2 tbsp. of your favorite white icing and mix into the cake to form a cohesive mixture.
4) Roll the cake into small balls and place on a cookie sheet.
5) Place cookie sheet into the freezer for 20 minutes to let the cake balls harden.
6) Melt Wilton's Candy Melts and partially dip the sticks into the melted candy.
7) Place the stick into the frozen cake balls and let the candy harden for 10 minutes.
8) Once all of the sticks are placed into the cake balls, you may need to reheat the candy melts before your dip the cake into the melt.
9) Before the candy hardens, sprinkle it with sprinkles!


Here are some great ideas I love for the upcoming Holidays:


 Have fun with Cake Pops!

Friday, July 20, 2012

China Cabinet, Not Just For Dishes

With all our cooking gadgets filling up our kitchen cabinets, Emerich and I needed some extra space for some of our china. But we also decided to let it be a place to really showcase who we are! I love pieces of furniture that tell a story about a trip somewhere interesting or a memory. This is still a work in progress, but we are starting to fill it with things that really represent us like our favorite cook books, pictures and trinkets. But I did tell Emerich, no law books :)


By adding pictures and memorabilia, you are able to really keep the cabinet interesting.


Pantry Storage

Have a small pantry with lots of clutter? Need something to help you organize all your tasty treats? Check out what I've done.


Such an easy solution to a cluttered cabinet!


The containers can be found at amazon.com and shops like Bed Bath & Beyond. The brand is called "OXO containers".


These labels are so fun to make and have around the house. First, you want to buy chalkboard paper with a sticky back (can be found at craft stores like Michaels). Then buy a large cutter in a shape that you like (also can be found at craft stores like Michaels).

Tuesday, July 17, 2012

A Dresser Makeover


While searching for an antique dresser to go with the laid-back style of our bedroom, I was disappointed at the selection. We went to every antique store, flea market and resale shop and could not find anything! After a while, I decided that I was going to just find a dresser and refinish it myself, but that search didn't go well either. So I opted for an experiment and was really glad that I did!

Below are the steps on how to make a "Weathered Wood Finish" or a "Faux Barnwood" look. This entire project was a blast, but there were a few things that really made it for me:

1) Incredibly inexpensive--total cost was under $60!
2) Really fun afternoon project--especially adding the dents and dings with the hammer and chain
3) Finding some unique door pulls to add your personal style


What you will need:

* Raw Wood Dresser (or any sanded wood piece--you could even make a table or bookcase!)
          - I found mine at Ikea for $34.99
* White Wood Stain (Water-based works best because it dries quickly and is has almost no odor)
          - I used MINWAX Water-Based Wood Stain in White Oak
* A Flat Gray Paint (any color or brand will do--pick a shade of gray that you like)
*Foam Brushes (2)
          - You may also use a bristle brush, but foam works too
*Hammer, Metal Findings, etc. to rough it up a little bit

Step One: Staining the Wood
Make sure your stain is well-stirred before using. Stain the wood using a foam brush. Using your wood stainer apply a thick coat and let it dry. Do not wipe of any of the residue (sometimes the staining can will tell you to do so, but just leave it). This is the base coat for your wood so make sure you like the color of the stain that you chose.


Step Two: Adding the "Weathering"
After the staining has dried (usually about 10 minutes, if you are outside), dab the edge of a clean foam brush into the well-stirred flat gray paint. Brush it sparingly on the already stained wood. Let it dry. See video below.

Video:


Step Three: Rough it Up
This is where it really gets fun! Grab a hammer, some old biscuit cutters, a metal chain, etc. and rough up that wood! It'll soften it up and give it some character (especially if your wood is new). I like to hammer down the edges of the wood to give it a smoother finish--just an idea!


Step Four: Add Some Knobs
I purchased these from Anthropologie and they were on sale for $2.95--love a sale! But you can use any pulls you like :)


Questions? Please feel free to contact me!


Monday, June 11, 2012

Breakfast With Superheroes

One of my favorite things to do when I'm in Baton Rouge is to go to Coffee Call with my nephews. We eat beignet fingers, drink OJ and consume about 3 cups of powdered sugar (half of which ends up on the floor and in our hair, on our clothes...etc). I have been going to Coffee Call since I was little and it's so great now to take my nephews and experience it with them.

They are ready to protect and serve.

My Visit to Baton Rouge

Last weekend I flew down to Baton Rouge to visit family before my friend's beautiful wedding in New Orleans. I played with my nephews, got decorating inspiration from my sisters gorgeous house and ate some amazing food.

Grant & Snoopy

Walker After His Swimmeet 

Liz's Gorgeous House


Love these containers she bought at Hobby Lobby to put hair ties and accessories in.


Liz's Panel Paintings...Gorgeous 


Loved this painting so much that Liz gave it to us for a wedding gift--yay!


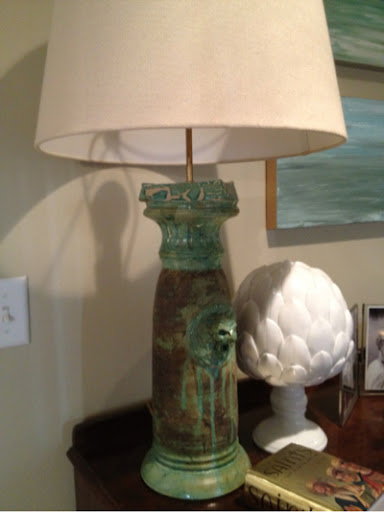
How great is this lamp?


This is a great way to display pictures and cool nick-nacks.


Gorgeous shelves in the guest room. 


Saturday, June 9, 2012

Rustic End Table


 I know I mentioned Randolph Street Market a few posts ago, but this is the end table Emerich and I picked out for my big 1/4 of a century Birthday gift!

You know you're getting old when you pick furniture for your birthday presents...

This end table is made from salvaged railroad pieces and reclaimed wood. Love. 

Right now it's hanging out in Emerich's Man Cave, but as soon as the furniture is delivered and we have a rug, it's moving-on-up to the grownup living room!


Can't wait to see what we find next time!

Yogurt Banana Oat Muffins


These delicious muffins are HEALTHY too! Made with Greek yogurt and ripe (very ripe!) bananas and covered with a crunchy oat topping. Perfect for a breakfast on the go or bring them to your next coed kickball game for a fan fav!

Ingredients

Muffins:
2 cups whole wheat all-purpose flour
1/2 cup white sugar
1/2 cup light brown sugar
3/4 teaspoon baking soda
1/2 teaspoon sea salt
1/4 cup butter, melted
2 large eggs
1 1/2 cups mashed ripe banana (about 3 bananas)
1 (6-ounce) container 0% Greek yogurt (I like Chobani)
1 teaspoon vanilla extract
1Cooking spray

Topping:
1/4 cup butter, melted
1 cup old-fashioned oats
1/4 cup whole wheat flour
1 teaspoon cinnamon
1/2 teaspoon sea salt

Preparation
1. Preheat oven to 350°F.

2. Combine flour, sugar, baking soda and salt in a bowl. In a separate bowl, combine butter, eggs, bananas, yogurt and vanilla, mixing well. 

3. Slowly add flour mixture to banana mixture until fully blended into a batter.

4. Pour mixture into pre-sprayed (with baking spray, to prevent sticking!) muffin tins.

5. For topping, add oats, flour, cinnamon and salt to melted butter in a separate bowl. Mix until crumbly and sprinkle on top of muffin batter.

4. Bake at 350° for 25 minutes or until a wooden pick inserted in center comes out clean. Cool 10-15 minutes on wire rack. And enjoy!

Tuesday, June 5, 2012

It's Been Three Weeks and Still No Furniture...

We made the big trip over to Chicago on May 21st, but the movers have been slow to follow. It's been almost 3 weeks and we still have no couch, dining chairs or pots and pans! But I've still been keeping an eye out for some new additions I would like to make to our new home. Two weeks ago we went to Randolph Street Market and I got an early birthday present as well as took a few pictures of some things I thought would look just right in our house :)


Love this hutch and think it would look great in a distressed blue color.


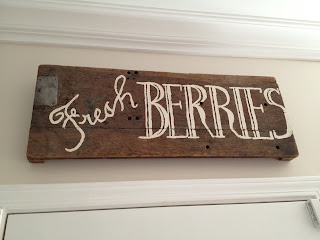
Buck and Roux bought me this sign from an old farmer--Love!


Everyone knows I love fresh berries.

Sunday, May 27, 2012

A New Chapter in Chicago

After a crazy weekend with Emerich's graduation from Boston University Law School and packing up our little Boston apartment, my mom-in-law and I met the movers and loaded my car with Buck and Roux and headed on our 16.5 hour journey across the country to Chicago. Emerich had to leave after graduating on Sunday to be here to pack for the bar, so he was lucky enough to fly.

We did 12 hours on Monday (leaving Boston at 2:30 p.m.) and arriving in Toledo, OH to visit Emerich's grandparents. It was so great to see them, and really great to get a good night sleep before the second half of my journey. On Tuesday I drove the last 4 hours and pulled into our new home. This is the home I have been so excited to move into for months now, except it just doesn't look the same without any furniture. 

Emerich and I unloaded my car and both dogs, who were relieved to get out of their tiny 3 foot by 3 foot space where they had been riding in the back of my car. 


Still with all of that stuff in my car, we don't have much to fill up our new house. So this was this weeks goal--to get a bed and to get some internet! After 12 phone calls, 3 hours, and 2 visits from comcast we were able to get some internet. But until last night we were still sleeping on a double-sized blow up mattress (not fun when your husband is 6'7"). After our bed arrived on Wednesday, we bought our rug on Friday and our mattress arrived yesterday, our room is starting to look the way I have always dreamed. Although we still need a few things...


Tuesday, May 1, 2012

What's For Dinner?: Rosemary Turkey Burgers stuffed with Goat Cheese


As an undergrad at UNC-Chapel Hill, I loved having friends over for dinner. A favorite dinner quickly emerged--my Rosemary Turkey Burgers stuffed with Goat Cheese with a Balsamic Glaze. We would all purchase an ingredient and the boys would grill them on the patio. I have so many wonderful memories of grilling out with my best friends eating these Turkey Burgers. After many trials, I think I have perfected this recipe and I am ready to share it with y'all. I promise you won't believe how great they taste and how healthy they are! (Even the boys chose these over red-meat burgers!)

Rosemary Turkey Burgers stuffed with Goat Cheese

Ingredients
Burgers:
1 lb of 99% Lean Ground Turkey Breast
1/2 c. Skim Milk
1 Slice of Wheat Bread (Crust removed)
1 tbsp of Dijon Mustard
1/4 c. Worcester Sauce (or more to taste) 
1/2 Onion, Diced
2 Garlic Cloves, Minced
1 Sprig of Fresh Rosemary, Chopped
Pepper to Taste
4 oz. Plain Goat Cheese

Toppers:
Balsamic Glaze
Tomato Slices
Caramelized Onions
Sauteed Mushrooms
Lettuce (Spinach or Arugula is great too!)
Hamburger Buns (I tend to go for the whole wheat buns)


Directions

Heat the milk over a stove top, but be careful to not let it come to a rolling boil. When the milk is warmed, remove it from the stove and pour it in a heat-proof bowl. Tear the bread into pieces and place it in the bowl. After the bread has soaked up the milk, add the turkey meat and mix well. After, add the remaining ingredients except the goat cheese and mix well. Using the turkey meat, make the patties and stuff 2 tbsp. of goat cheese in the middle of the patties. The patties should be no bigger than the size of your fist and be careful not to make them too thick or they won't cook throughout. Cook the patties on the grill or on the stove top until done. Place the burgers between buns or on a salad and enjoy!


As a Salad


Or as a Burger


Training Shoes

I am a Personal Trainer at Equinox and often get a lot of questions about foot wear. Training shoes, trail shoes, running shoes, barefoot shoes, tennis shoes...etc. The list goes on. But to be fair, the endless list of types of shoes is important. Your feet play a huge role in the way your body moves and if your feet aren't outfitted for the sport at hand, you just may be selling your performance short.

While running you are moving in a linear fashion, in tennis you are moving from side to side and in basketball you need to be able to get some air. The tread and the ankle support of the shoes you are wearing play a huge role in how your body responds to contact with the ground.

Let's get down to business. Gym shoes? Running shoes? Kickin' it shoes?

For the Gym: You want training shoes.


$84.95

I like New Balance's Minimus 20 Training shoe. Firstly, they are really cute, but most importantly they are lightweight and offer the perfect tread for training in the gym. This tread allows for any sort of twisting, lunging, jumping--you name it, but it also has enough support to help you during your workout.

For Running: You want running shoes. 


$109.99

The New Balance 890v2's are WAY cool. I may be partial because I am currently living in Boston and my friend Gretchen just finished the Boston Marathon, but how sweet are these shoes? Not only do they look great (because lets be honest, we all care that they look great), but they are actually really great running shoes. They are lightweight and have enough support to last you 26.2 miles. 


$65.00

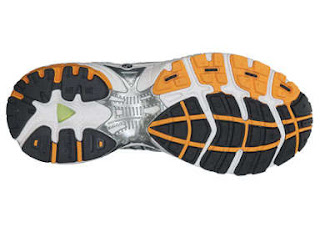
Brooks is a great classic running shoe. The Defyance 4 is a great shoe for every type runner from beginners to advanced runners. Also, this shoe offers the first biodegradable midsole--neat huh? we all love eco-friendly shoes :)

For Zumba: You want dance shoes. 

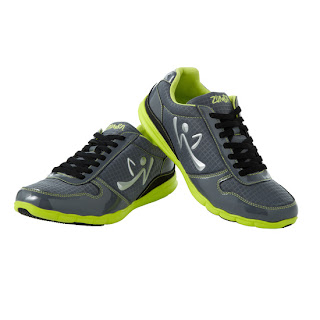
$75.00

Without fail, after every Zumba class someone stays behind to ask me what type of shoes they should be wearing for Zumba class. In years past my answer has always been jazz shoes or some sort of shoe meant for dance, but recently Zumba has started selling their own shoes. How exciting! These shoes promise to offer more mobility during your Zumba class. Can't wait to try them out!

Have questions about other shoes? Email me!